
How to explain a perio report to your patients
A periodontal report puts findings in front of a patient. The conversation gives those findings meaning.
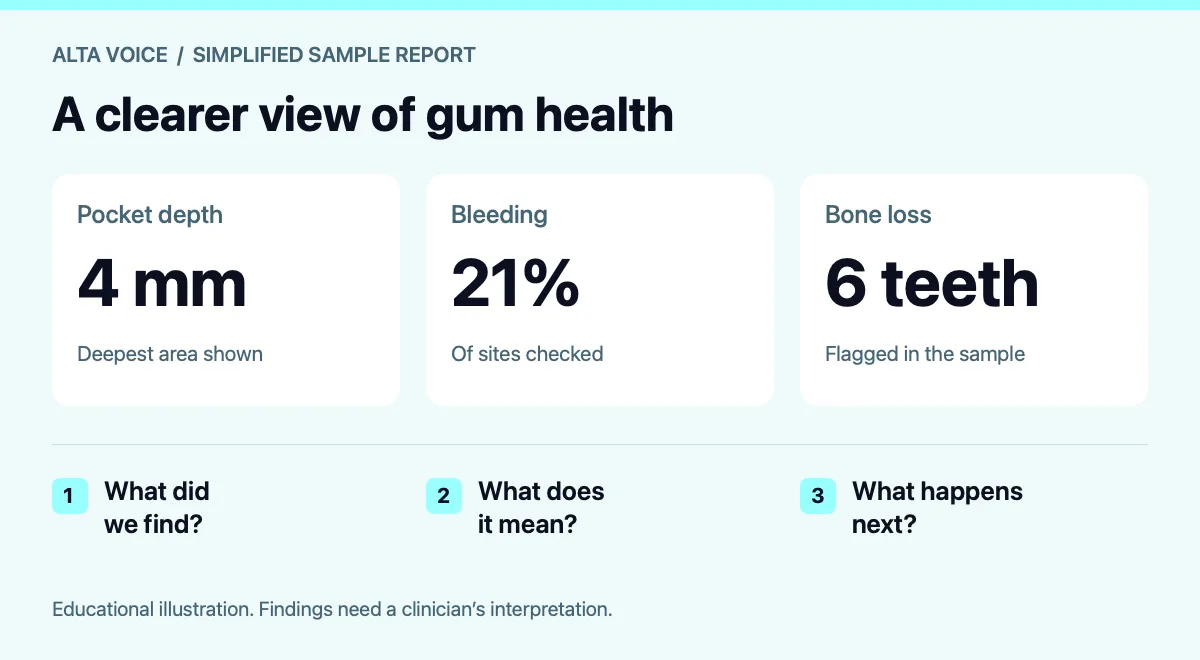
Someone seeing pocket depths, bleeding percentages, and bone loss for the first time may not know which number matters, what it describes, or how it connects to the care you recommend. A useful explanation helps them answer three questions: What did you find? What does it mean for me? What happens next?
Here’s how to walk through Alta Voice’s sample patient report, drawing on the Patient Conversation Workbook, Prosper with Perio, and The Ultimate Guide to Increasing Treatment Acceptance. The goal is to give patients enough understanding to participate in the decision.
1. Start with the patient, then the summary
Before presenting findings, ask what the patient wants to understand. A question about bleeding may need a different starting point from a concern about discomfort, cost, or time away from work.
“Before we look at the report, what questions do you have about your gums or today’s exam?”
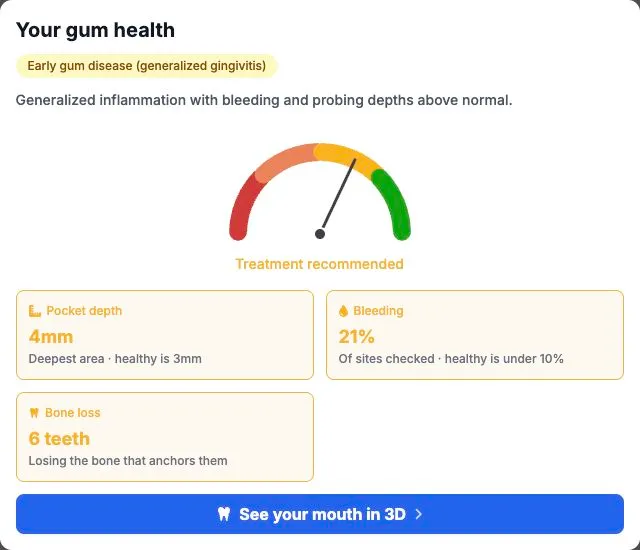
The sample opens with a gum-health summary, an indicator, and three findings. Give a brief explanation of your clinical assessment before unpacking those details. Review the report against the examination and history first; a summary label or score cannot carry the diagnosis on its own.
This is the starting point of the workbook’s CLEAR method: connect with the patient’s concern and lead with the information they need most.
2. Explain what each number describes
Use the report as a shared reference. Point to one finding, explain it, and pause for a question before moving to the next.
Pocket depth: what was measured?
The sample shows 4 mm as its deepest measurement. Explain that probing measures the space between the gum margin and where the probe reaches alongside the tooth. Locate the relevant area on the chart so the patient knows the summary describes a particular finding.
“This number describes the space we measured beside the tooth. Let me show you where we found it and explain how it fits with the rest of your exam.”
That number alone does not establish the diagnosis or select a treatment. The clinician interprets probing alongside attachment levels, radiographs, history, and other findings.[4]
Bleeding: what does the percentage count?
The sample records bleeding at 21% of sites checked—about two in every ten measured sites. Make the denominator clear: it is a proportion of examination sites, not a percentage of teeth lost or a forecast of future damage.
“Some of the areas we checked bled during the exam. This percentage summarizes how often that happened. Let’s look at where it occurred and what it means alongside your other findings.”
Bone loss: which teeth need explanation?
The sample flags six teeth under bone loss. Use the relevant radiographs and examination findings to explain the support around those teeth. A count tells the patient how many teeth were flagged; it does not describe how much support has been lost or prove the rate of change.
“These are the teeth the report flags. I’ll show you the supporting images and explain what we know, including whether we have earlier records to compare.”
3. Use the 3D view to orient the patient
The sample includes a “See your mouth in 3D” link. Use the view to help the patient locate the area you are discussing, then connect it to the underlying chart or image. Explain what the display represents before asking the patient to interpret its colors or shapes.
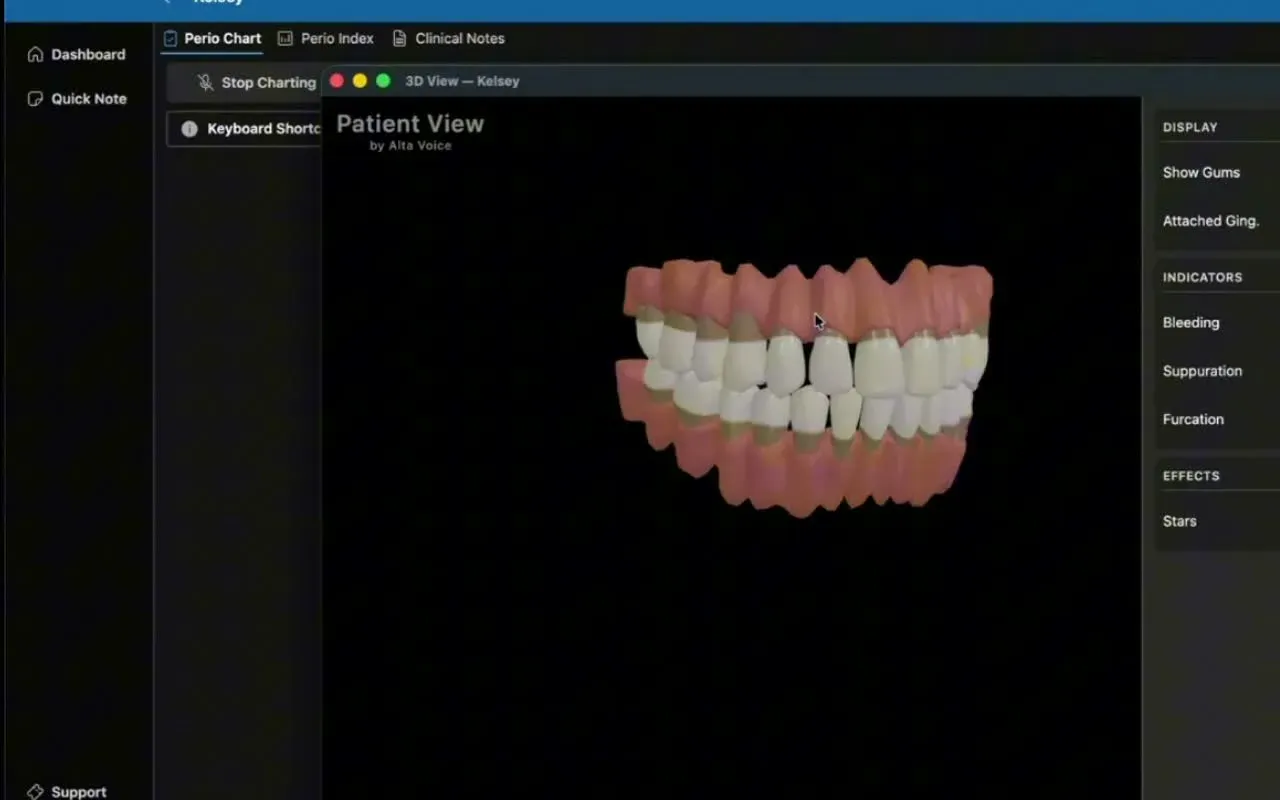
Prosper with Perio emphasizes showing the evidence, and the Treatment Acceptance guide describes visual aids as part of a case presentation. A practical application is to show one relevant area at a time and explain why it matters. Keep the chart, radiographs, and clinical assessment available when more detail is needed.
4. Connect the findings to this patient’s care
The report’s “What this actually means for you” section offers a bridge from measurements to explanation. Use it to discuss the findings in everyday language, including what you know and what remains uncertain. Describe risks in terms appropriate to the individual case.
Review the “Other factors” section with the patient so their history is accurate. The report also includes information about health beyond the mouth. Keep that discussion proportionate to the evidence; do not turn an association into a promise that periodontal treatment will prevent another disease.
Then use “Your path forward” to explain the clinician’s recommendation. A list of procedure names or codes still needs a conversation about purpose, options, expected benefits, limitations, and timing.
“Based on your full exam, I recommend this next step because of these findings. Here is what it involves, what we hope to improve, and what the alternatives would mean for you.”
The sample’s listed procedures are examples in a demonstration, not a treatment plan to copy into another patient’s care.
5. Use CLEAR to make room for the decision
The Patient Conversation Workbook lays out five steps. Here is how they can fit around the report:
- C · Connect with the patient’s concern. Begin with the question or worry they raised.
- L · Lead with the most important information. Give the central finding and its relevance before discussing every measurement.
- E · Explain in simple terms. Use a specific area on the report and explain unfamiliar language.
- A · Acknowledge their perspective. Pause for their reaction and take concerns about comfort, cost, or timing seriously.
- R · Recommend with confidence. Make the clinical recommendation clear, explain the reasoning, and invite questions.
If the patient hesitates, explore the concern before adding more information. Someone worried about the bill needs a different response from someone who is unsure why care was recommended.
- “I’m concerned about the cost.” Offer a written estimate and explain the expected patient portion and available payment options. Clearly identify anything still awaiting confirmation.
- “I’m worried it will hurt.” Ask what they are most concerned about and explain the comfort measures appropriate to the proposed treatment.
- “I need time to think.” Ask which questions remain and agree on a useful follow-up, while respecting their decision.
These are opportunities to understand the patient’s needs. A good report supports that discussion; it cannot resolve every practical barrier.
6. Check understanding and agree on the next step
Before moving to scheduling, ask the patient to describe the findings and plan in their own words. AHRQ’s teach-back guidance treats this as a check on how clearly the team explained the information.[5]
“I want to check that I explained this clearly. How would you describe what we found and the next step we discussed?”
Clarify any gaps, then establish what happens next: an appointment, further discussion, additional information, or a follow-up at an agreed time. Include the recommendation, the patient’s questions and decision, and the agreed next step in the record.
The Treatment Acceptance guide treats follow-up as part of the conversation. A reviewed report can give the patient something specific to revisit, alongside their written plan and estimate. Make it easy to contact the practice with questions.
A ten-minute report walkthrough
Pair the sample report with the workbook’s treatment-explanation exercise on page 19. Have one teammate explain the findings, one play the patient, and one listen. Use the SRP role-play on pages 31–32 only as its own scenario, where the clinical need has already been established.
Afterward, discuss three things: Which term needed a clearer explanation? Did the patient have space to raise a concern? Was the next step clear?
Get the Patient Conversation Workbook →
Sources and further reading
- The Patient Conversation Workbook, September 2026 release: CLEAR method, pp. 15–19; concerns, pp. 20–22; SRP role-play, pp. 31–32.
- Prosper with Perio: visual evidence and case presentation, pp. 12–14.
- The Ultimate Guide to Increasing Treatment Acceptance: visual aids, pp. 26–28; concerns, p. 29; financial discussion, pp. 34–35; follow-up, p. 43.
- American Academy of Periodontology: Staging and Grading Periodontitis. Clinical context for interpreting measurements; this article does not assign a diagnosis to the demonstration.
- AHRQ: Use the Teach-Back Method, Tool 5.
- Alta Voice sample patient report, reviewed October 26, 2026. Values and section names reflect that demonstration; the interface may change.
Example phrasing in this article is provided for team practice. Adapt it to the patient’s findings and the clinician’s assessment.